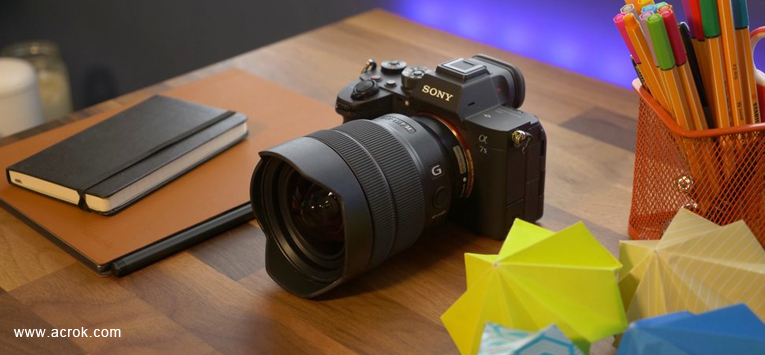
The Sony a7S III is a 12 MP camera that can shoot UHD 10-bit 4:2:2 Intraframe video internally, and RAW externally via HDMI. You"re able to capture UHD 4K video at up to 120p without pixel binning. This camera is able to record high speed (up to 240FPS) FUll HD video, as well. But if you plan to import the XAVC XS, XAVC S-I and XAVC S videos to After Effects for further editing, you will likely encounter MP4 video editing issues in After Effects.
Firstly, After Effects doesn't support XAVC HS and XAVC S-I format so you can't import all the Sony a7S III MP4 recordings to After Effects. Secondly, Sony a7S III often records videos with variable framerates but After Effects doesn't work with videos that have variable framerates, and end up having audio sync and audio drifting problems. For example, people can't import Sony a7S III XAVC HS .mp4 video to After Effects CC. Every time when they import it, it shows up as a grey image. All these issues together can be solved today in this article with the following way.
Convert Sony a7S III MP4 Video to After Effects Supported Format
If you have recorded videos in MP4 format with Sony a7S III, you can use Acrok Video Converter Ultimate to remux Sony a7S III MP4 to MPEG-2 codec for After Effects (CS3, CS4, CS5, CS6, CC). It also can fast convert MP4 to MPEG-2 MPG, H.264 MOV, etc for After Effects. Besides Sony a7S III recording videos, it also can transcode other Sony, Canon, GoPro, JVC, Nikon, Fujifilm, Panasonic MXF/MOV/MP4/MTS footage to After Effects compatible video and audio codec and format. In the conversion, it can keep the lossless video and audio quality. No audio loss. No video loss. No video audio out of sync issues.
Thus, you can tinker with options for video and audio video size, aspect ratio, encoder, and frame rate, audio sample, channel mode and volume for get better footage for After Effects editing. Furthermore, it is possible to crop your Sony a7S III video unwanted areas, trim Sony a7S IIIvideo length, merge different RAW and MP4 video clips to a single file and add text/image/video watermark into the video. For Mac users, you can turn to Acrok Video Converter Ultimate for Mac to convert Sony a7S III MP4 video files for editing in After Effects.
Free download and try Sony a7S III Video Converter
How to transcode Sony a7S III MP4 for editing in After Effects?
Step 1: Load MP4 video files
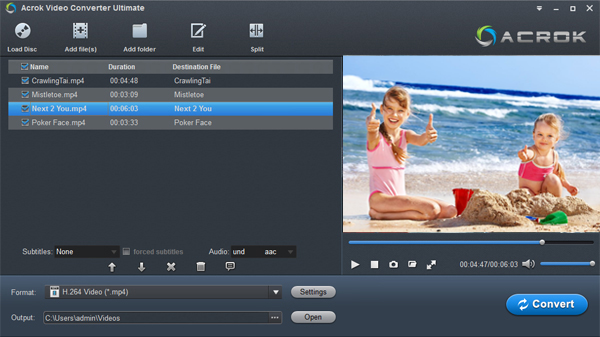
Install and launch MP4 to After Effects Converter and load source MP4 clips to it. You can import Sony a7S III footage to the program through "Add file" button or "Add folder" button. "Drag-and-Drop" feature and batch conversion is also supported.

Step 2. Choose After Effects supported format
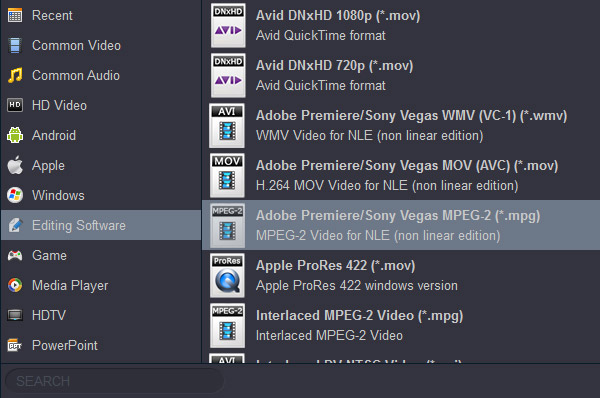
Click "Format" option to choose the output format. To make your After Effects to readthe output files, just choose the most After Effects accepted "MPEG-2 (*.mpg)" or "MOV Video AVC (*.mov)" under "Editing Software" option as output format. Since After Effects also accept wmv3 codec video, which offer the same video quality with smaller size comapring to H.264 codec video. So you also can choose wmv3 WMV here for After Effects. For high resolution video, you can choose 4K MP4 video from "4K Video"

Tip: Click "Settings" button if you'd like to customize advanced audio and video parameters like Video Codec, aspect ratio, bit rate, frame rate, Audio codec, sample rate, audio channels.
Step 3: Start converting MP4 to After Effects friendly video format
Click "Convert" button to start transcoding Sony a7S III MP4 video to MPG, MOV, WMV or H.264 MP4 files for importing to After Effects. When the conversion task is finished, click "Open" button to get the exported files. You can edit MP4 files in After Effects now.
How to Import Video into After Effects?
From the main menu, select File > Import > File (keyboard shortcut Ctrl/Cmd+I). This opens the import dialogue box and allows you to select one or more files from a particular folder. To select multiple files, click while holding down the Shift key for contiguous files or the Ctrl/Cmd key for non-contiguous (separated) files.
Select File > Import > Multiple Files (keyboard shortcut Ctrl/Cmd+Alt+I) to import multiple files located in different folders. The standard dialogue box appears, but after you click Open the box remains and you can navigate to another folder to select more files. Keep doing this until all files are selected, then click Done.
You can also bring up the dialogue boxes from the project panel:
Right-click anywhere in the project panel and select either Import > File or Import > Multiple Files.
Double-click anywhere in the project panel to bring up the standard import dialogue box.


