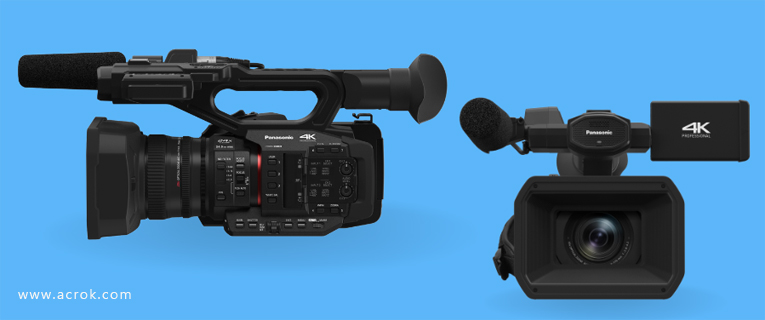
Panasonic has announced its new HC-X2 and HC-X20 4K 1.0"-type Sensor Camcorders at IBC 2022. Bring your mobile sports, event, or multi-camera video productions into the world of 4K with the Panasonic HC-X2 and HC-X20 Camcorder. Featuring a large 1" 15.03MP 4K sensor, the camcorders are can record high-quality, professional-grade video in up to UHD 4K (3840 x 2160) 10-bit 4:2:2 resolutions. The point here, many people find it a painful experience to import Panasonic HC-X2/HC-X20 4K MP4 and 4K MOV footage to DaVinci Resolve for further editing. And there are many frequently asked questions quoted below:
"I have recently got a Panasonic HC-X2 and whenever I import UHD 4K (3840 x 2160) video into DaVinci Resolve I get a warning with a list of code/file names and it says 'this file format is not supported'. Yet it has imported into DaVinci Resolve and I am able to use it. I am just confused at why I get this warning every time that the file format is not supported? - Anderson, Dan"
"I edit on a Mac in DaVinci Resolve 18, and have recently been working with Panasonic HC-X20 footage. The problem is, when I open my project in my other computer, DaVinci Resolve asks me to relink the footage, and asks for the specific clips. But in the Finder, I cannot see the individual clips... only the "Private" folder that the HC-X20 generates. - Preglej, Dalibor"
Many Panasonic HC-X2 and HC-X20 users have the similiar problems when importing 4K MP4/MOV footage to DaVinci Resolve. In fact, the MP4 and MOV files captured by Panasonic camcorder is quite difficult to edit with. To fix the problem, the easy workaround is to convert 4K MOV/MP4 to a fully compatible format such as Apple ProRes, DNxHD for DaVinci Resolve.
Actually, it's not as difficult as you imagine. What you need is just a common video converter like Acrok Video Converter Ultimate. This program features high efficiency and seamless conversion. By running it, there's no need to set the codec yourself: the program has optimized presets for DaVinci Resolve. With it, you can do batch conversion from MP4, MOV, AVCHD, MXF, VOB, MKV, AVI and more to DaVinci Resolve compatible format with least quality loss. In addition, you can also use it to backup Blu ray movies to your computer or mobile hard drive, rip and convert Blu-ray to any format for playing on any digital device. If you're using a Mac PC, simply turn to Acrok Video Converter Ultimate for Mac, which has the same function as the Windows version.
Just download, install and launch this great Panasonic Video Converter and then follow the tutorial to work with Panasonic HC-X2/HC-X20 4K footage in DaVinci Resolve smoothly.
Converting 4K MP4/MOV footage for DaVinci Resolve
1
Load 4K footage
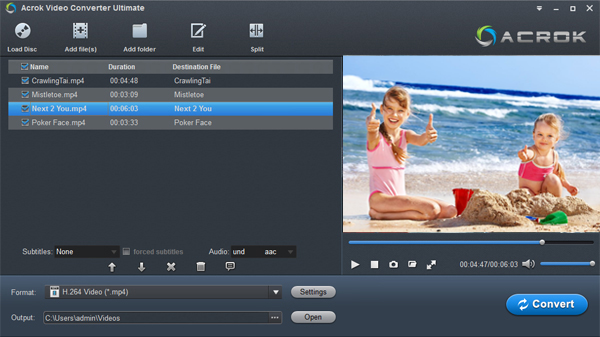
Run the 4K Video Converter on your PC and click the Add File icon to import Panasonic HC-X2 or Panasonic HC-X20 4K .mp4 and .mov videos to be converted. You can also drag and drop video clips to the application. The app supports converting multiple files at a time.

2
Choose the output format
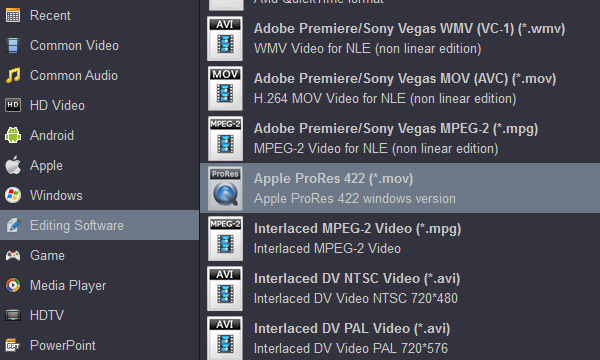
The program has three already optimized the video settings for DaVinci Resolve. You can select DNxHD MOV or Apple ProRes 422 MOV from "Editing Software" as the output format. If you like, you can select 4K H.264 MP4 as output format too. All output videos will keep the original quality of MP4/MOV video and seamlessly fit DaVinci Resolve and more. Here we recommend you choose Apple ProRes 422 (*.mov).

Tips: The default setting works well. Of course, if you want to customize video and audio encoding settings, just click the "Settings" button to customize these settings. You can adjust the output video/audio resolution, frame rate, bit rate, etc. to customize the output files to get the best quality you want. For getting 4K videos, please select "Orginal" in Resolution (pix) column.
3
Start transcoding
After all the necessary settings, simply hit the blue Convert button on bottom of the main windows and the conversion from Panasonic HC-X2/HC-X20 to DaVinci Resolve will begin immediately.
When the conversion is finished, you can click "Open" button to get the generated MOV files effortlessly. Launch DaVinci Resolve on your Mac or Windows PC, choose "File > Import to import converted video files in DaVinci Resolve for further editing.


