The Sony A9 III is a professional full-frame mirrorless camera that's designed for sports and wildlife photography and photojournalism. The new global shutter on the Sony a9 III even gives us access to much faster shutter speeds than we have ever seen from a full frame camera. You have some of the best video features on offer, like 4K 120p with no sensor crop. The only problem comes when the users tried to import Sony a9 III native MP4 files to DaVinci Resolve on your computer.
You may find that DaVinci Resolve even the latest version 18 doesn't read raw Sony a9 III XAVC HS/XAVC S/XAVC S-I files properly – no audio is imported; or sometime it even says that ‘the file could be damaged or an unsupported format'. The main reason is that the Sony a9 III MP4 is not the best editing format for DaVinci Resolve. Well, here we'd like to offer an easy solution for you to resolve the issues.
Possible solution: Convert Sony a9 III MP4 into a DaVinci Resolve highly friendly format
You can transcode Sony a9 III MP4 footage to DaVinci Resolve natively supported formats (MP4 and MOV are highly recommended). Along with some help from third-party software, it can be done effortlessly. Acrok Video Converter Ultiamte is recommended here.
Download MP4 to DaVinci Resolve Converter:
Overall, the program is the best MP4 Converter for Sony a9 III raw footage. With it, you can effortlessly transcode Sony a9 III XAVC HS/XAVC S/XAVC S-I to H.264, DNxHD or Apple ProRes, which will create an DaVinci Resolve friendly file format keeping the original quality. Besides Premiere, this software can also export MPEG-2 for Premiere Pro, After Effects, Vegas Pro and more NLE systems for native editing. Acrok Video Converter Ultimate is the alternative choice for encoding Sony a9 III MP4 videos to DaVinci Resolve. Now download it and follow the tutorial below to get the work done.
How to Convert Sony a9 III MP4 for DaVinci Resolve 18?
1
Load MP4 video files
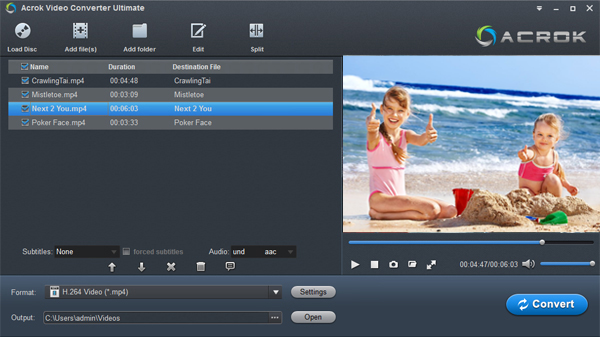
Install and launch Acrok Video Converter Ultimate as the best MP4 to DaVinci Resolve Converter on your computer and load source Sony a9 III MP4 clips to it. You can import clips to the program through "Add file" button icon. You can directly drag the files to the program interface.

2
Choose output format
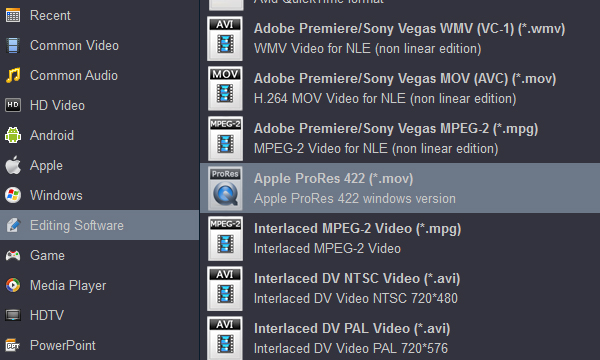
Windows User: Click "Format" pull down list to select Editing Software > Apple ProRes 422 (*.mov) as the best video format for DaVinci Resolve 18, 17, 16, etc. 4K MP4 and QuickTime MOV formats are the good choice as well.

Mac User: You can get Apple ProRes profiles under "Final Cut Pro" category.
3
Settings and Editing
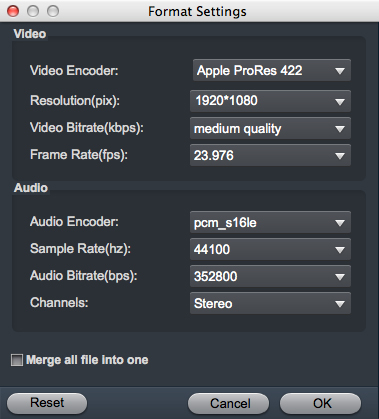
In case the default settings do not fit your requirement, you can customize output parameters as you want. Adjust the resolution, bitrate, etc according to your need; you can also keep the parameters as original.

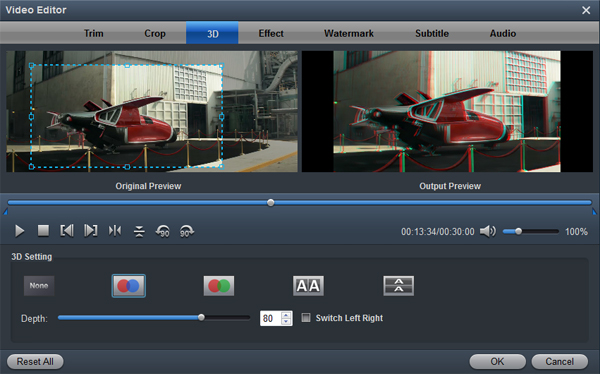
On the top tool bar on the main interface, click the "Edit" icon to open "Video Editor" window, you can trim Osmo Action 4 footage to remove the unwanted parts by setting the start and end time, crop to remove the black borders or unwanted area by dragging the dash line around the video frame, flip video, add text/image/video watermark, change video picture effect, replace/remove audio in video, add external subtitles, etc.

4
Start converting Sony a9 III videos
Click "Convert" button to start transcoding Sony a9 III MP4 video to DaVinci Resolve editable format.
When the conversion task is finished, click "Open" button to get the exported files. You're now ready to get the result files into DaVinci Resolve to do further editing. Launch DaVinci Resolve on your computer, choose "File > Import" to import any file with smooth editing.
 Secured Shopping
 30-day Money Back
 Automatic Updates
 Customer Service


